Over the weekend, I did the wall mural for Cassidy. Click
here for the blog post leading up to the mural.
First I started with taping off the area to be painted. This is the most crucial part due to spacing and making sure your lines are straight! Do not rush, take your time..its worth it!
Next I began painting the white background/border that the shoe motif was to be printed on. I used a semi-gloss to allow me to apply the paint evenly over the surface of the existing green color, and to have a smooth and touch-up friendly painting surface.
After eating a small, very small bite to eat for lunch that I had packed for myself I waiting for the white paint to dry then I started to use my cheetah stencil for the border.
Stencils are great, but they are still time consuming. This is another area not to rush with because if you aren't patient and very careful, you can make a mess of the entire thing very easily. If it weren't for this stencil, I would have killed myself trying to create all of these!
Next after the stencil has been applied to the divided sections of wall, I rested for a bit, then started again!
(5 hours up and down on a ladder is rough!)
This time I started sketching the outlines with my pencil that I kept forgetting was in my ponytail! ;)
![]() |
Disregard the paint splattered shorts..this is what artist clothing looks like! Not glamorous!
My main reason for posting this particular picture was to show you the scale of how large these "shoes" were on this wall. They are 3' high and 4' wide each !!!! |
I drew out all of the shoes in pencil rough sketch before applying the paint. This step doesn't have to be perfect at all because you will be covering it all up with paint, just make sure not to press into the paint on the wall to create a ridge because if you do, you may see it even after the paint is applied.
![]() |
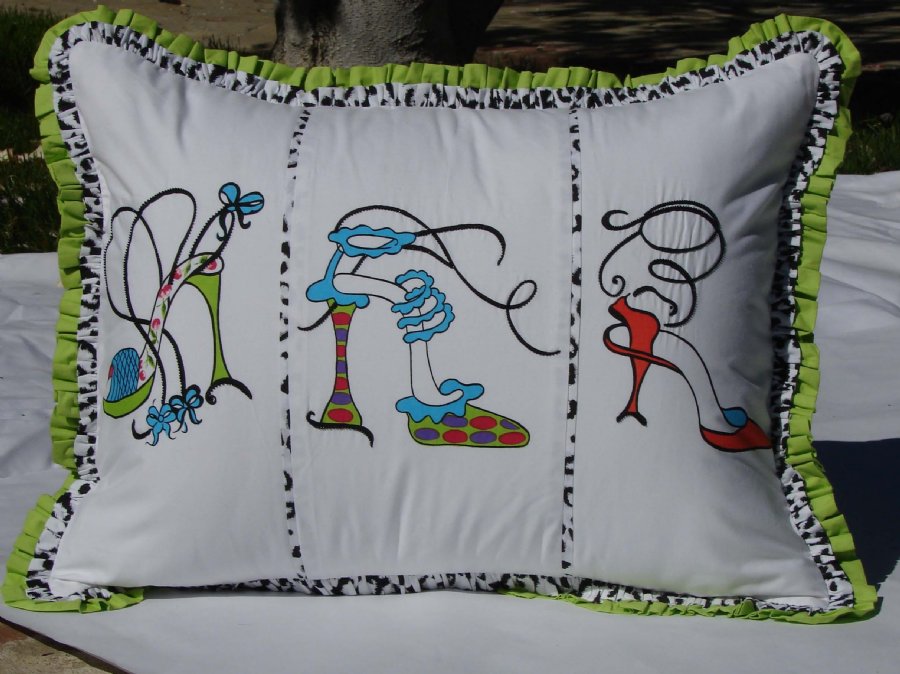
| Inspiration for Mural, Cassidy's bed linens |
![]() |
| Original Sketch Chosen |
After penciling in the design, here comes the color! And boy is it color! I used all Behr paints for this and if your interested can let you know the colors. My favorite was the color Dragon Fruit.
One thing I have noticed about myself and from techniques of painting is that I typically paint from left to right. Which is just like you write so it should be second nature you would think, but no...there is no right or wrong way, that's just my process if it in any way helps you out when you paint.
(Its also much easier to trim a room from left to right because you can watch your brush strokes)
Always, always, always use a
PURDY brush. There is not another brush that compares....don't go the cheap route, you will regret it. Purdy brushes last forever if you take care of them, and believe you me..I am not being paid for this endorsement!;)
OK, lastly, I outlined all the graphic drawings of the shoes with a
paint pen. These are the greatest little inventions. They make me so happy, and they save me so much time!

Cassidy loooovvvvveeeddddd the outcome, and her Mom was thrilled as well. This is one bedroom that can last as she grows into a young adult.
![]() |
| Yep, that's a spiral staircase in her bedroom ;) |
I was very happy with the results!!
Ask me about wall murals, face painting, and furniture if you are interested. I love doing this as a hobby, but love it even more when I can share my creativity with others and make their space more enjoyable and beautiful!